
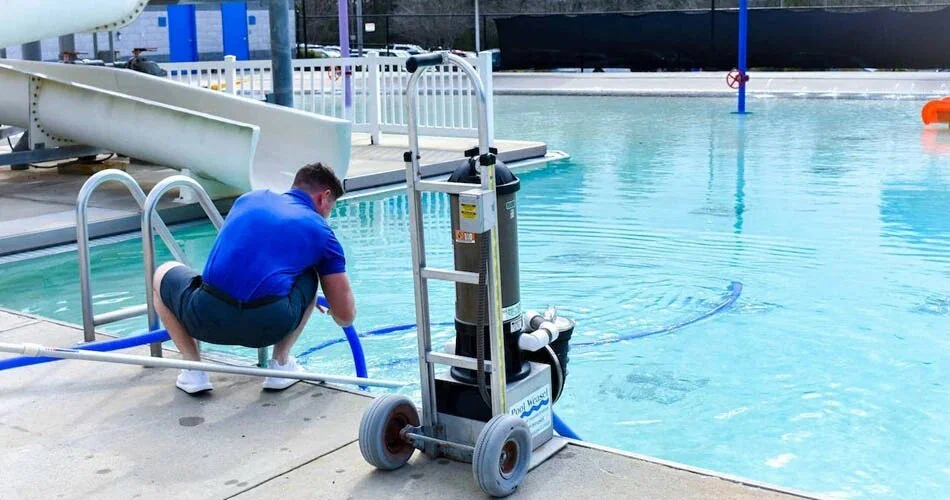
When something goes wrong with a swimming pool, it is not always easy to identify the cause. A drop in water level, a pump that struggles to circulate water, or a crack near the pool edge may point to different problems. Repairing the visible damage without understanding what caused it can lead to repeated issues.
A professional pool repair inspection helps identify the source of the problem and determine which repairs are needed. Instead of guessing or replacing parts unnecessarily, the inspection focuses on the pool’s structure, plumbing, equipment, and surrounding surfaces.
Knowing what happens during this process can help you prepare for the appointment, understand the findings, and make informed decisions about the work. Here is what homeowners should expect during a pool repair inspection.
Why Is a Pool Repair Inspection Important?
Swimming pools contain several connected systems that must work together. The pool shell holds the water, plumbing moves it through the system, and pumps and filters help maintain circulation and water quality. Damage to one component can sometimes affect other parts of the pool.
For example, low water levels may result from a leak, evaporation, or a problem with a fitting. Poor circulation may come from a clogged filter, a pump issue, or a restriction in the plumbing. These problems can look similar at first but require different solutions.
An inspection helps narrow down the possible causes before repair work begins.
It can also help you:
- Understand the severity of the damage.
- Identify issues that may become more serious if ignored.
- Decide whether a repair or replacement is appropriate.
- Plan the work according to your budget and priorities.
- Avoid spending money on repairs that do not address the underlying problem.
The purpose is not simply to find visible damage. It is to understand the condition of the affected area and recommend a suitable repair approach.
1. Reviewing the Pool’s Problems and Repair History
A pool inspection often begins with a discussion about the symptoms you have noticed. Your observations can help the technician decide where to look first and which tests may be necessary.
Before the appointment, think about when the problem started and whether it has changed over time.
Questions You May Be Asked
A technician may ask:
- When did you first notice the problem?
- Has the pool been losing water faster than usual?
- Does the pump make unusual noises?
- Have you noticed cracks, stains, or loose tiles?
- Does the problem occur continuously or only under certain conditions?
- Have you already attempted any repairs?
- Have there been recent storms, freezing conditions, or nearby construction activities?
These details can provide useful clues. For example, a problem that began after a severe storm may need a different investigation from one that developed gradually over several months.
If you have previous repair records, equipment details, or photographs showing how the damage has changed, share them during the inspection. This information may help the technician compare the pool’s current condition with its earlier state.
2. Inspecting the Pool Shell and Visible Surfaces
The pool shell and its interior finish are among the first areas that may need attention when structural damage is suspected.
Depending on the pool’s construction, the inspection may include concrete surfaces, plaster finishes, tiles, coping, steps, and other visible components.
Checking for Cracks
Not every crack indicates a major structural problem. Some surface cracks may be limited to the finish, while others can suggest movement or damage affecting the pool structure.
The technician will consider the crack’s location, size, appearance, and surrounding conditions. Changes in the crack over time may also be relevant.
If a crack appears significant, additional investigation may be needed to determine whether it is allowing water to escape or indicating a deeper structural issue.
Examining Tiles and Coping
Loose tiles, damaged coping, or gaps around the pool edge can affect the appearance and condition of the surrounding area. In some cases, these problems may also allow water to enter places where it can cause further deterioration.
The inspection helps determine whether the damage is isolated or connected to a larger issue.
Evaluating the Pool Finish
A worn, rough, or deteriorating finish may require attention even when the pool is not visibly leaking. The technician may look for areas where the surface has become damaged, uneven, or separated.
The findings help determine whether a localized repair is appropriate or whether a larger surface restoration should be considered.
3. Checking for Possible Pool Leaks
Water loss is a common reason homeowners request a pool inspection. However, seeing the water level drop does not automatically mean there is a leak.
Water naturally evaporates, and the amount can vary with temperature, wind, humidity, and sun exposure. Splashing and backwashing can also reduce the water level.
The goal is to determine whether the loss appears normal or whether further leak testing is necessary.
Looking for Signs of Water Loss
During the inspection, the technician may consider:
- How quickly the water level is dropping.
- Whether wet areas are visible around the pool.
- Whether cracks or damaged fittings are present.
- Whether the water loss changes when equipment is running.
- Whether plumbing connections show signs of leakage.
- Whether nearby soil or surfaces appear unusually saturated.
These observations can help narrow down possible leak locations.
When Additional Leak Testing Is Needed
A visual inspection may not reveal every leak. Some problems occur in underground plumbing, concealed fittings, or areas that are difficult to access.
Depending on the symptoms, a technician may recommend more specific testing to identify the source. The appropriate method depends on the pool’s construction, plumbing layout, and suspected leak location.
Finding the source before beginning repairs helps avoid unnecessary work. For example, patching a visible crack will not solve a separate plumbing leak elsewhere in the system.
4. Examining Pool Plumbing and Connections
The plumbing system carries water between the pool, pump, filter, and other equipment. A damaged connection or restricted pipe can interfere with circulation and may contribute to water loss.
During this part of the inspection, the technician may examine accessible pipes, valves, fittings, return lines, and skimmer connections.
Common Plumbing Concerns
Possible problems include loose fittings, deteriorated seals, cracked pipes, blocked lines, and damaged connections.
Some issues are visible near the equipment area, while others may require further testing. Underground plumbing problems can be particularly difficult to locate without a targeted investigation.
Checking Water Circulation
Poor circulation may cause uneven water movement, reduced flow from return outlets, or difficulty maintaining water quality.
The technician may look at the water movement, equipment pressure readings, and the condition of accessible plumbing components. These checks can help identify whether the problem involves a blockage, a valve, a pump, or another part of the system.
Once the likely cause is identified, the technician can explain which components need repair and whether additional testing is necessary.
5. Evaluating the Pump, Filter, and Other Equipment
Pool equipment works together to keep water moving and support filtration. When one component stops working properly, the entire system may be affected.
An inspection may include the pump, filter, valves, motor, heater, and other installed equipment relevant to the reported problem.
Pool Pump Inspection
The pump moves water through the filtration system. A technician may check for unusual noise, vibration, visible leaks, restricted flow, or signs that the pump is struggling to operate.
Possible causes include a blockage, a worn component, air entering the system, or a mechanical fault. The correct repair depends on the cause and the condition of the equipment.
Filter Inspection
A dirty or damaged filter can restrict water flow and place additional strain on the system. The technician may check pressure readings, visible damage, and other signs of poor filter performance.
Cleaning, repairing, or replacing the filter may be recommended depending on its condition.
Valves, Motors, and Controls
Faulty valves may prevent water from moving through the intended route. Motor problems can affect equipment operation, while electrical or control issues may stop systems from running as expected.
Electrical equipment should be inspected by a qualified professional. Homeowners should avoid opening electrical enclosures or attempting repairs around wet equipment.
An equipment inspection helps distinguish between a component that needs servicing and one that may need replacement.
6. Assessing the Surrounding Pool Deck and Edges
Pool repairs are not always limited to the area inside the pool. The surrounding deck, coping, joints, and nearby surfaces can also provide important clues about the condition of the pool area.
Cracked or uneven deck surfaces may create tripping hazards. Damaged joints can allow water to enter areas where it may contribute to deterioration. Movement around the pool edge may also deserve closer attention.
What the Technician May Look For
The inspection may include:
- Cracks or uneven areas in the deck.
- Loose or damaged coping.
- Gaps between adjoining surfaces.
- Signs of water collecting near the pool.
- Deterioration around steps or entry points.
- Areas where surface movement may be occurring.
Not every deck crack is caused by a pool problem, and some issues may be unrelated to the pool shell. The technician must consider the location and condition of the damage before recommending a repair.
If the deck needs separate attention, the inspection can help you understand whether it should be handled alongside the pool repair or as a separate project.
7. Determining Which Repairs Are Necessary
After examining the relevant areas, the technician can use the findings to recommend a repair plan.
The exact recommendations depend on the pool’s condition. Some problems may need a small repair, while others require specialized testing or more extensive work.
For example, a damaged fitting may be relatively straightforward to address. A suspected underground leak, recurring structural crack, or failing equipment system may require a more detailed assessment.
Repair or Replacement?
The decision often depends on the severity of the damage, the condition of the affected component, and whether the problem can be corrected reliably.
A repair may be suitable when the damage is limited and the remaining component is in good condition. Replacement may make more sense when a component has deteriorated significantly or repeated repairs have failed to solve the problem.
Ask the technician to explain the reason for the recommendation and whether there are reasonable alternatives.
You can explore the available pool repair services to understand the types of issues that may require professional attention.
8. Understanding the Repair Estimate and Timeline
Once the scope of work is established, the next step is to review the estimate and expected schedule.
A useful estimate should explain the problem being addressed, the recommended work, and the major factors affecting the cost. Depending on the project, it may also identify materials, labor, equipment, and any additional testing required.
What Can Affect the Cost?
Pool repair costs vary according to several factors:
- Type of damage: A small fitting repair differs from structural restoration.
- Location: Accessible equipment may be easier to repair than underground plumbing.
- Materials: The required repair materials depend on the pool’s construction.
- Extent of work: A localized repair usually involves a different scope from a larger restoration.
- Additional testing: Some problems require specialized methods to locate the source.
Avoid relying on a general price range without understanding the actual problem. Two pools showing similar symptoms may require very different repairs.
What About the Timeline?
The repair schedule depends on the work involved, material requirements, weather, and the time needed for curing or testing.
Ask whether the pool must remain out of use during the repair and when it can safely return to service. If the project involves multiple repairs, confirm the planned order of work so you know what to expect.
How to Prepare for a Pool Repair Inspection
A little preparation can make the inspection more useful and help the technician understand the problem more quickly.
Before the appointment:
- Write down the symptoms. Note when the problem began and whether it has become worse.
- Take photographs. Pictures of cracks, damaged tiles, wet areas, or equipment problems may help show how the issue developed.
- Gather equipment information. If available, keep the model details and maintenance records for the pump, filter, and other affected equipment.
- Clear access to equipment. Remove items that block the equipment pad, accessible valves, or other areas that may need inspection.
- List previous repairs. Explain what has already been done and whether it resolved the problem.
- Prepare questions. Ask about the likely cause, repair options, expected timeline, and any work that may be needed afterward.
Do not attempt to expose underground pipes, dismantle equipment, or perform electrical checks before the appointment. Leave those tasks to qualified professionals.
What Happens After the Inspection?
The inspection should leave you with a clearer understanding of the pool’s condition and the next steps.
Depending on the findings, the technician may recommend an immediate repair, additional diagnostic testing, routine servicing, or a larger restoration project.
If more testing is needed, ask what it is intended to establish and how the results will affect the repair plan. This helps you understand why a final recommendation may not be possible during the initial visit.
Before approving the work, make sure you understand the proposed scope, expected cost, schedule, and any conditions that could affect the final result.
After the repair is completed, ask whether the system needs to be tested, whether the pool requires a specific waiting period before use, and what signs you should monitor afterward.
Frequently Asked Questions
1. How long does a pool repair inspection take?
The time depends on the size of the pool, the reported problem, and how accessible the affected areas are. A basic visual assessment may be relatively quick, while suspected leaks or complicated equipment problems may require additional testing.
2. Does every pool inspection include leak detection?
No. A general inspection may identify signs of water loss, but specialized leak detection may be a separate step. The technician can recommend further testing if the source of the water loss cannot be confirmed through the initial assessment.
3. Should I drain my pool before the inspection?
Do not drain the pool unless a qualified professional specifically recommends it. Draining can create risks for certain pool structures, particularly where groundwater conditions may affect the shell. Ask the technician whether the water level needs to be adjusted for the planned inspection.
4. Can a pool be repaired without replacing the entire structure?
Yes. Many problems involve individual components, such as plumbing, equipment, tiles, fittings, or localized surface damage. Whether a repair is sufficient depends on the cause and severity of the problem. Significant structural damage may require more extensive work.
5. Should I use my pool while waiting for a repair?
It depends on the problem. Electrical hazards, major leaks, unstable surfaces, or structural damage may make the pool unsafe to use. Follow professional guidance and keep people away from any area that presents a potential safety risk.
Conclusion
A professional pool repair inspection helps identify the source of a problem before repair work begins. By checking the pool structure, plumbing, equipment, and surrounding surfaces, a technician can determine which issues need attention and recommend a suitable course of action.
Preparing useful information, asking clear questions, and reviewing the repair estimate can help you make informed decisions about your pool. If you notice unusual water loss, cracks, poor circulation, or equipment problems, addressing them early may help prevent further damage.
Paradium Pools provides pool repair and related services to help homeowners address pool damage and restore proper function. Start with an inspection, understand the findings, and choose repairs based on the pool’s actual condition.